%202%20(1).svg)
.svg)

How to Troubleshoot AC Not Cooling Properly in 6 Easy Steps
Written by
On Time Heating & Cooling
Published on
June 1, 2026
Is Your AC Not Cooling Properly? Here's What to Check First
If you're dealing with ac not cooling properly what to check, you're not alone — this is one of the most common calls homeowners in Menomonee Falls, WI make every summer. The good news? Many of the most likely causes are simple enough to spot yourself before calling a pro.
Quick Answer: AC Not Cooling Properly — What to Check
- Thermostat settings — Make sure it's set to "Cool" mode and the temperature is below the current room temp
- Air filter — A clogged filter is the #1 cause of poor cooling and can cut efficiency by 15-20%
- Vents and return grilles — Check that none are blocked by furniture, rugs, or debris
- Outdoor condenser unit — Clear away leaves, grass, and debris; rinse coils gently with a hose
- Condensate drain line — A clog here can trigger a safety shutoff that stops cooling entirely
- Circuit breaker — A tripped breaker can cause the outdoor unit to stop running while the fan keeps blowing
When Southeast Wisconsin summers heat up — and May 2026 has already brought some unseasonably warm days — your air conditioner works harder than ever. So when it runs but your home stays warm, it's frustrating. You're not sure if it's a quick fix or a sign of something serious.
Here's the reassuring truth: up to 30% of "AC running but not cooling" service calls get resolved by simple checks like thermostat settings, a dirty filter, or a blocked vent. You don't always need a technician. But knowing what to look at — and in what order — makes all the difference.
This guide walks you through exactly that, step by step.

Ac not cooling properly what to check terms to learn:
AC Not Cooling Properly What to Check First
Before diving headfirst into complex mechanical components under the hood of your outdoor unit, it is crucial to perform a basic visual and sensory scan. When your home starts feeling more like a sauna than a sanctuary, your first instinct might be to panic. Instead, take a deep breath and look for the most obvious clues.
Start by placing your hand directly over one of your supply registers. Is the air blowing weakly, or is it blowing with normal force but simply feels warm? Understanding this distinction is half the battle. If the air is warm, your outdoor unit might not be running at all, or you could be dealing with a system that has lost its cooling charge. If you want to dive deeper into this specific symptom, read our detailed guide on Why AC Is Blowing Warm Air.
Next, listen closely to your system. Do you hear the indoor blower fan humming? Is the outdoor unit making a normal, steady hum, or is it completely silent, perhaps accompanied by an occasional clicking sound? These sensory clues are incredibly valuable. Before you pick up the phone to schedule an emergency service call, running through a quick mental checklist of these immediate signs can save you a lot of time and unnecessary worry. For a complete starting point, check out our AC Troubleshooting Tips Before Calling a Pro to rule out the easiest oversights.
How to Troubleshoot Your Air Conditioner in 6 Easy Steps

Troubleshooting your cooling system doesn't require a background in engineering. By following a structured diagnostic path, you can systematically eliminate the most common culprits and pinpoint when a problem requires professional help.
Before you begin, gather these basic household items:
Essential Tools for DIY AC Checks:
- A flashlight (for inspecting dark filter slots and utility areas)
- A fresh set of AA or AAA batteries (for your thermostat)
- A replacement air filter (matched to your system's exact dimensions)
- A garden hose with a standard spray nozzle (never use a pressure washer!)
- A screwdriver (if your thermostat cover or filter grate is secured with screws)
With these tools, you can tackle the fundamental airflow and power checks that resolve up to a third of all cooling issues. If you suspect your system is struggling primarily with moving air, find specialized advice on Solving Home AC Airflow Problems.
Step 1: Verify Thermostat Settings When AC Not Cooling Properly What to Check
A simple thermostat mix-up is a common cause of a cooling crisis. If someone bumped the screen or a power flicker reset the programming, your system might not receive the signal to cool.
First, verify that your thermostat is set to Cool mode. If it is set to Heat or Off, your air conditioner won't run. Second, ensure the fan setting is on Auto, not On. When set to "On," the blower runs continuously, blowing unconditioned, warm, and humid air back into your rooms between cooling cycles.
Finally, check the target temperature. It must be set at least 5°F below the current room temperature to trigger the system. If the screen is blank or flashing a low-battery icon, replace the batteries immediately. A weak battery can prevent the thermostat from sending the signal to start your outdoor condenser. If your system refuses to react after a battery swap, read more about what to do when your AC Not Turning On.
Step 2: Inspect and Replace a Clogged Air Filter
If your thermostat settings are correct but your home is still warm, check the indoor air filter. A dirty filter is the single most common cause of an AC not cooling properly.
When a filter becomes heavily loaded with dust and pet dander, it restricts airflow through your HVAC system, causing:
- Efficiency Loss: A clogged filter causes up to a 15-20% efficiency loss.
- System Strain: Your blower motor works harder to pull air, shortening its lifespan.
- Coil Freezing: Without enough warm air passing over the cold evaporator coil, the coil's temperature drops below freezing, causing moisture to turn to ice and block airflow.
Check your filter monthly during heavy cooling seasons. Hold it up to a light; if you cannot see light passing through, replace it. Standard MERV 8 to 11 filters offer the perfect balance of filtration and airflow. If your system has already iced over, learn more about resolving an AC Freezing Up.
Step 3: Clear Blocked Vents and Return Grilles
Your air conditioner must maintain a balanced loop of airflow, drawing warm air out through return grilles and distributing cool air back through supply registers. If this loop is disrupted, cooling performance suffers.
Inspect both the supply vents and return air grilles in every room. Ensure they aren't blocked by furniture, rugs, or storage boxes.
Avoid the myth that closing vents in unused rooms saves energy. Modern central air systems are designed for specific air pressure. Closing registers increases static pressure, which can cause duct leaks, strain your blower motor, and reduce efficiency. Ensure at least 80% of your registers are open. If you struggle with uneven temperatures, check out our tips on Fixing Uneven Cooling Issues at Home.
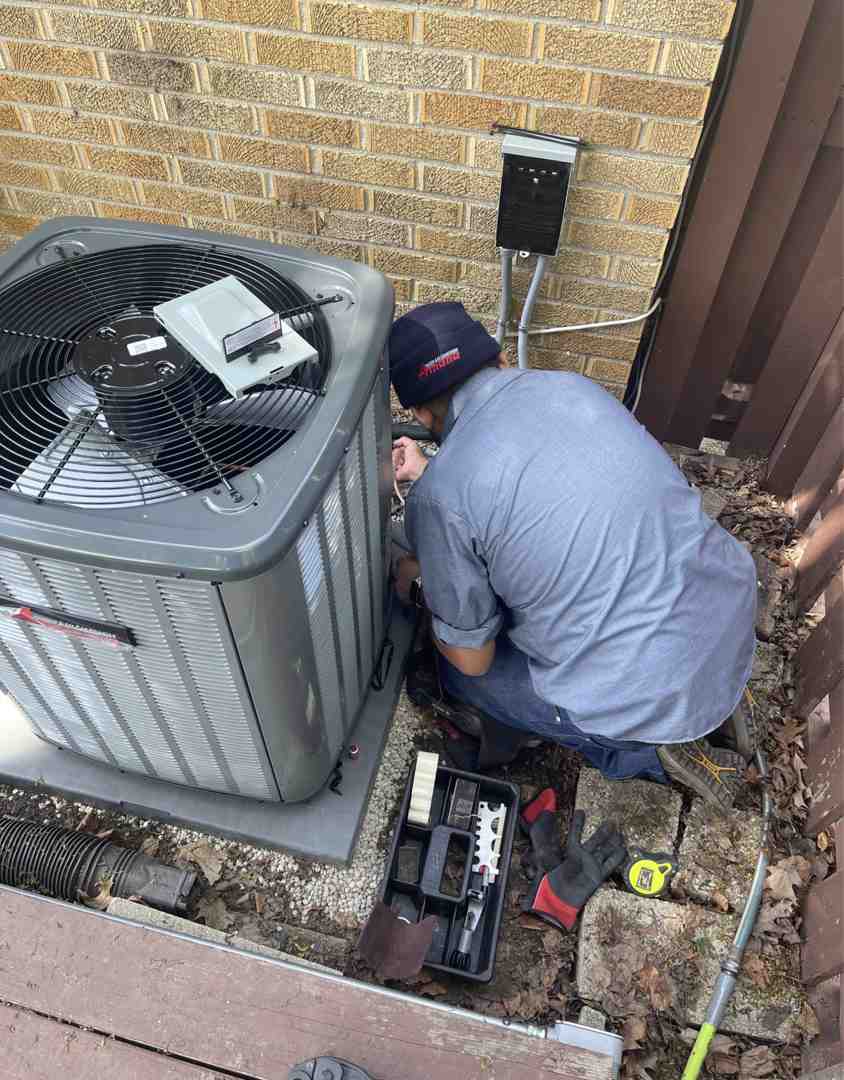
Step 4: Clean the Outdoor Condenser Unit and Clear Debris
Your outdoor condenser releases the heat absorbed from inside your home. To do this, the fan draws outdoor air through the metal condenser coils. If these coils are dirty or blocked, your system will struggle to cool.
Over time, the outdoor unit accumulates grass clippings, leaves, and dirt. To safely clean it:
- Shut off the power: Locate the outdoor disconnect box and pull the plug or flip the switch to "Off."
- Clear the perimeter: Maintain at least two feet of clear space around the unit by trimming bushes and weeds.
- Remove loose debris: Gently clear away leaves and twigs from the cabinet.
- Rinse the coils: Using a garden hose with a gentle spray, rinse the coils from the top down. Never use a pressure washer, as high pressure will bend the delicate aluminum fins.
Straighten any bent fins gently with a fin comb. Keeping this unit clean prevents your system from running 10-15% longer than necessary. If you live in Sussex and notice your system constantly running without cooling, discover more about Why AC Struggles to Cool Rooms in Sussex.
Step 5: Check the Condensate Drain Line and Float Switch
As your AC dehumidifies your home, moisture condenses on the indoor evaporator coil and drips into a drain pan, routing outside through a PVC condensate drain line.
Because this line is constantly wet, it can become clogged with algae or mold. If the line clogs, water backs up. To prevent water damage, modern systems use a safety float switch that cuts power to the outdoor unit when water rises.
If your indoor fan blows but the outdoor unit won't turn on, check your drain pan. If you see standing water, you likely have a clogged drain line. You can often clear minor clogs by attaching a wet/dry shop vac to the outdoor end of the line. Flush the line with vinegar or hot water every few months to prevent clogs. If your home feels unusually muggy, learn more about Why AC Isn't Dehumidifying Your Home.
Step 6: Reset Tripped Circuit Breakers
Your central AC uses two separate high-voltage circuits: one for the indoor blower and one for the outdoor condenser. Because they run on separate breakers, the outdoor breaker can trip while the indoor blower keeps running, resulting in warm air blowing from your vents.
To check for a tripped breaker:
- Locate your home's main electrical panel.
- Look for breakers labeled "AC," "Air Conditioner," or "Condenser."
- A tripped breaker often sits in the middle or shows a red indicator.
- To reset it, flip the breaker completely to Off first, then firmly back to On.
The Golden Rule: If the breaker trips again immediately, do not reset it a second time. A repeatedly tripping breaker indicates a serious electrical short, a failing capacitor, or a compressor drawing too much current. If your system struggles to power up, read our insights on Why AC Is Struggling to Start Up.
Recognizing Complex Mechanical and Electrical Failures
If you have completed all six DIY troubleshooting steps and your home is still not cooling, the issue is likely a more complex mechanical or electrical failure. These issues require specialized tools and diagnostics to resolve safely. Trying to fix them yourself can void your manufacturer's warranty or lead to costly mistakes. For an overview, explore our guide on Exploring Common AC Problems and Solutions.
Frozen Evaporator Coils and Airflow Blockages
A frozen evaporator coil is a major roadblock to cooling. When ice forms on the indoor coil, it acts as thermal insulation, preventing heat transfer. The air passing through remains warm, and airflow drops to a trickle.
If you notice ice forming on the brass valves, copper refrigerant lines, or the indoor coil cabinet, turn your system off at the thermostat immediately and switch the fan setting to "On." This allows the indoor fan to blow room-temperature air over the coil to melt the ice safely. Do not restart cooling until the ice has completely thawed (which can take 4 to 24 hours). If the ice returns quickly after replacing the filter, you likely have a low refrigerant charge or a failing blower motor.
Refrigerant Leaks and Failing Compressors
Refrigerant cycles through a closed loop between your indoor and outdoor units to absorb and release heat. A common myth is that air conditioners "use up" refrigerant over time. In reality, a properly operating system should never need its refrigerant topped off.
If your system is low on refrigerant, it means you have a leak. Signs of a refrigerant leak include:
- A gradual loss of cooling capacity over several weeks.
- A distinct hissing or bubbling sound from the indoor or outdoor unit.
- An oily residue on the copper refrigerant lines or near connection valves.
A low refrigerant charge reduces cooling capacity by 20-30%, leading to high energy bills and putting immense strain on your compressor. If you suspect a leak in Brookfield, read more about AC Systems Blowing Warm Air in Brookfield.
Electrical Issues and Bad Capacitors
The most common part failure during hot summer months is a failed dual-run capacitor. The capacitor provides the electrical energy needed to start both the condenser fan motor and the compressor.
Because capacitors are sensitive to extreme heat and power surges, they degrade over time. When a capacitor begins to fail, you will often hear a loud humming sound from your outdoor unit, but the fan blades won't spin and the compressor won't start. Letting the unit sit and hum can cause permanent damage to the fan motor and compressor. If your outdoor fan refuses to spin, check out our troubleshooting guide on Why Your AC Fan Isn't Running.
When to Stop DIY and Call a Licensed HVAC Professional
While simple DIY fixes can save you time, there is a clear line where troubleshooting must stop for your safety and the health of your system. Working with high-voltage electricity, complex control boards, and pressurized chemical refrigerants requires specialized equipment and training.
Handling refrigerant requires proper certification, and it is dangerous for an unlicensed individual to handle or recharge refrigerant. Additionally, attempting to diagnose electrical shorts or replacing a compressor without proper diagnostic meters can lead to severe personal injury or complete system damage.
To help you decide whether to grab your toolkit or call a professional, refer to this comparison table:
| Symptom / Task | DIY Check? | Call a Professional? | Why? |
|---|---|---|---|
| Thermostat batteries & settings | Yes | No | Simple, safe, and takes less than 5 minutes. |
| Replacing a dirty air filter | Yes | No | Standard homeowner maintenance; no tools required. |
| Clearing leaves/grass from outdoor unit | Yes | No | Safe as long as the power disconnect is switched off. |
| Thawing a frozen evaporator coil | Yes | Yes | You can safely thaw it, but a pro must find why it froze. |
| Hissing sounds / suspected refrigerant leak | No | Yes | Requires specialized leak detectors and handling. |
| Outdoor unit hums but fan won't spin | No | Yes | Typically a bad capacitor or motor; involves high-voltage. |
| Breaker trips repeatedly | No | Yes | Indicates a serious electrical fault or compressor failure. |
If your system is showing signs of advanced wear, check out our guide on the Signs Your AC Needs Repair. If you are experiencing uneven temperatures or weak airflow that simple cleaning didn't fix, learn how we resolve these issues with our guide on Resolving Uneven Cooling with AC Service.
Complex AC Not Cooling Properly What to Check Diagnostics for Professionals
When our factory-trained technicians arrive at your home, they perform a comprehensive, pro-grade diagnostic check that goes far beyond basic troubleshooting. We use precision instruments to measure exactly what is happening inside your system.
Our professional diagnostic process includes:
- Refrigerant Pressure Testing: We connect digital manifold gauges to measure precise subcooling and superheat temperatures to ensure the correct refrigerant charge.
- Electrical Analysis: We test the microfarad ratings of your capacitors, measure the amp draw of your compressor and fan motors, and inspect contactors for pitting or burn marks.
- Airflow and Static Pressure Testing: We measure the temperature split (the difference between the air entering the return and leaving the supply, which should ideally be between 16°F and 22°F) and check for ductwork restrictions.
- Ductwork Inspection: We inspect your ducts to ensure your cold air is actually reaching your living spaces, preventing loss of conditioned air through hidden leaks.
If your system is running continuously without ever reaching your set temperature, discover our professional Solutions for AC Running Constantly.
Frequently Asked Questions About AC Cooling Issues
Should I turn off my AC if it is running but not cooling?
Yes, absolutely. If your air conditioner is running constantly but the air coming out of your vents is warm or weak, you should turn the system off immediately at your thermostat.
Continuing to run a malfunctioning air conditioner can cause severe, irreversible damage to your compressor. For example, if the system is running with a frozen evaporator coil, liquid refrigerant can travel back down the line and enter the compressor. Because liquids cannot be compressed, this leads to a destructive event known as "liquid slugging," which will instantly destroy the compressor's internal valves. It is always better to be warm for a few hours while waiting for a technician than to turn a simple repair into an expensive system replacement.
Why is my AC running but the indoor temperature isn't dropping?
If your system is blowing cool air but the indoor temperature stubbornly refuses to drop, there are a few potential causes:
- Extreme Outdoor Heat: Most standard residential air conditioners are designed to handle outdoor temperatures up to about 92°F to 95°F. On exceptionally hot days, your system may struggle to keep the indoor temperature at your usual setting, especially if your home has poor attic insulation or high solar heat gain from unshaded windows.
- Thermostat Calibration: Your thermostat may be miscalibrated or located near a heat source (like a sunny window or a warm appliance), causing it to read the indoor temperature incorrectly.
- Undersized System: If you have recently added a sunroom or home addition, your existing AC unit may now be too small to handle the increased cooling load.
How often should I perform preventative maintenance on my AC?
You should have your air conditioner professionally serviced at least once a year, ideally in the spring before the heavy cooling season begins. Regular maintenance is essential for keeping your system running at peak energy efficiency, extending its overall lifespan (which is typically 10 to 15 years), and keeping your manufacturer's warranty valid.
In addition to our professional spring tune-ups, you should perform your own monthly homeowner maintenance, which includes checking and replacing your air filter every 30 to 90 days and keeping the outdoor unit clear of debris. To learn more about the long-term benefits of regular servicing, read our guide on Preventative AC Maintenance.
Conclusion
When your air conditioner isn't cooling properly, taking a systematic approach to troubleshooting can save you time, money, and stress. By starting with the easiest checks — like your thermostat settings, air filter, and outdoor unit clearance — you can resolve many common cooling issues on your own.
However, when those simple DIY steps don't bring back the chill, you need an HVAC partner you can trust. At On Time Heating & Cooling, we are proud to provide top-quality AC repair and maintenance services to homeowners throughout Menomonee Falls, WI, and the surrounding Southeast Wisconsin communities, including Brookfield, Waukesha, Sussex, Pewaukee, and New Berlin.
We have built our reputation on a commitment to absolute punctuality, blending old-school, friendly customer service with modern technical expertise. Our factory-trained technicians don't cut corners, and we stand behind our work with transparent service and our priority "On The Dot Club" membership plans.
Don't sweat through a hot summer afternoon. If your DIY troubleshooting hasn't restored your comfort, let our friendly team get your system back in peak shape. Schedule Professional AC Services with On Time Heating & Cooling today!
.svg)
.svg)
.svg)
Monday to Sunday:
24/7
24/7
Payments By:

review us on:
©
on time heating & cooling All rights reserved.
Designed & Developed By :
.svg)