Step-by-Step Guide to What to Expect During AC Replacement
Learn what to expect during AC replacement with this step-by-step guide covering preparation, installation, testing, and post-install walkthrough.
Shane Herro
Owner & Lead Tech

Learn what to expect during AC replacement with this step-by-step guide covering preparation, installation, testing, and post-install walkthrough.
What to Expect During AC Replacement: Your Quick-Start Guide
What to expect during AC replacement is something every homeowner should understand before installation day arrives. For most homes in Menomonee Falls and the surrounding area, the process is straightforward — but knowing what happens and when makes the whole experience far less stressful.
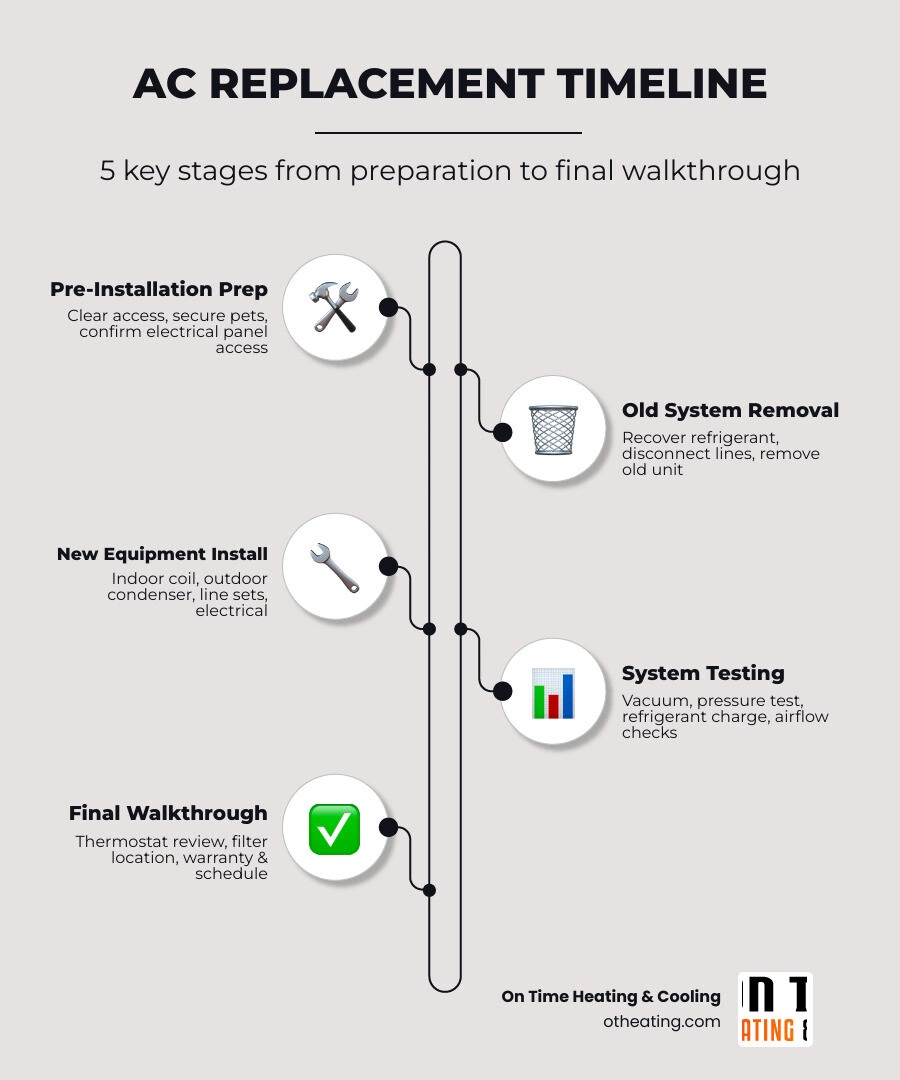
Here is a quick overview of what the process looks like from start to finish:
- Pre-installation prep - Clear access paths, secure pets, and confirm electrical panel access
- Old system removal - Technicians recover refrigerant, disconnect lines, and remove the old unit
- New equipment installation - Indoor coil, outdoor condenser, line sets, and electrical connections are installed
- System testing and commissioning - Vacuum pull, pressure testing, refrigerant charge, and airflow checks
- Final walkthrough - Technician reviews thermostat operation, filter locations, warranty details, and maintenance schedule
Most standard AC replacements take 4 to 8 hours. Complex jobs involving ductwork modifications or a full HVAC overhaul can extend to one to two days. You will typically be without cooling for roughly 4 to 6 hours during the process — uncomfortable in summer, but very manageable with a little planning.
Knowing these steps ahead of time means no surprises on installation day. The sections below walk through each phase in detail so you know exactly what is happening and why.
Preparing Your Home: What to Expect Before the Crew Arrives
Long before our service trucks roll into your driveway, a little home preparation goes a long way toward ensuring a smooth, efficient installation day. Think of this as setting the stage for our technicians so they can focus entirely on getting your new system up and running.
If you are still on the fence about whether you actually need a brand-new system or if a quick fix will do, it helps to weigh your options. You can read our guide on Should I Repair or Replace My HVAC System to make an informed choice. However, if you have already decided on an upgrade, here is what you should do the day before our crew arrives:
- Clear the indoor workspace: Our technicians will need plenty of room to work around your indoor furnace cabinet or air handler (usually located in the basement, utility closet, or attic). Please move any stored boxes, holiday decorations, or shelving units to create a clear, three-foot perimeter around the system.
- Clear the outdoor workspace: Walk outside to your existing condenser unit. Trim back any overgrown shrubs, weeds, or low-hanging branches. Clear away patio furniture, toys, or garden tools so the crew has a wide, safe path to transport heavy equipment.
- Provide access to the electrical panel: The installation team must shut off the power to your HVAC system at the main breaker. Make sure the path to your electrical panel is completely clear and unlocked.
- Secure your pets and children: An AC replacement involves open doors, heavy machinery, sharp tools, and electrical work. For their own safety—and to prevent a curious pup from escaping through an open door—please keep pets and children in a safe, quiet room away from the action.
- Protect your valuables: The constant movement of technicians carrying heavy components can cause minor vibrations in nearby walls. It is a smart idea to temporarily remove fragile picture frames, decorative plates, or valuables from the walls adjacent to the utility closets or stairwells.
The Step-by-Step Timeline of What to Expect During AC Replacement

When our team arrives at your home, we do not just start ripping out wires. A professional AC Installation Process is carefully choreographed to maximize efficiency and protect your property.
Here is what the typical hour-by-hour timeline looks like on installation day:
- 7:30 AM – 8:00 AM | Arrival and Initial Walkthrough: The lead technician will introduce the team, review the scope of work with you, lay down protective drop cloths over your flooring, and perform a final site assessment.
- 8:00 AM – 10:00 AM | Decommissioning and Removal: The crew safely recovers the old refrigerant, disconnects the electrical and plumbing lines, and physically removes the old indoor and outdoor units.
- 10:00 AM – 11:30 AM | Site Preparation: Technicians inspect the existing ductwork, level the outdoor ground pad, install vibration-isolation pads, and prepare the indoor plenum for the new evaporator coil.
- 11:30 AM – 3:00 PM | Installing the New System: The team mounts the new indoor coil, positions the outdoor condenser, runs brand-new copper refrigerant lines, updates the electrical whip and disconnect box, and wires up the new thermostat.
- 3:00 PM – 4:30 PM | Testing and Commissioning: Technicians perform critical pressure tests, pull a deep vacuum on the lines, charge the system with refrigerant, and run the AC to measure performance.
- 4:30 PM – 5:00 PM | Walkthrough and Cleanup: The crew packs up their tools, sweeps the workspace clean, walks you through your new thermostat, hands over the warranty paperwork, and answers any remaining questions.
Decommissioning and Removing the Old System
The removal phase is where the technical work truly begins. The most critical step here is refrigerant recovery. Under EPA Section 608 regulations, venting chemical refrigerants into the open air is strictly illegal and subject to heavy fines. Our certified technicians use specialized recovery machines and cylinders to safely draw out the old refrigerant from your system without letting a single drop escape into the atmosphere.
Once the system is safely depressurized, we disconnect the electrical wiring and the copper line sets. The old outdoor condenser unit is unbolted from its pad, and the indoor evaporator coil is carefully slid out of your ductwork. We handle all the heavy lifting, loading the old, bulky equipment onto our trucks for proper, environmentally friendly disposal.
Installing and Connecting the New AC Unit
With the old equipment cleared away, we begin installing the new, high-efficiency system. Indoors, the new evaporator coil is meticulously fitted into your duct plenum. Ensuring an airtight seal here is crucial; any air leaks around the coil will drastically reduce your system's overall efficiency.
Outdoors, we place the new condenser unit on a fresh, level composite pad. We always use high-quality isolation pads beneath the unit to absorb operational vibrations, keeping your system whisper-quiet.
Next, we run a brand-new copper line set to connect the indoor and outdoor components. While some cut-rate installers try to save time by reusing old copper lines, we know this is a recipe for disaster. Old lines often contain residual acid, moisture, and contaminants from the old compressor that can ruin your brand-new system within months. Finally, we install a new electrical disconnect box and flexible whip outdoors to ensure your system complies with the latest local electrical codes.
System Testing, Commissioning, and Quality Verification
Once everything is connected, the most critical phase of the installation begins: testing and commissioning. A brand-new air conditioner is only as good as the calibration it receives on day one.
First, we perform a high-pressure nitrogen test (typically pressurized to 300–400 PSI) to verify that all copper solder joints are completely leak-free. After confirming the system is airtight, we connect a specialized vacuum pump to evacuate all air, nitrogen, and moisture from the lines. We pull this vacuum down to a level below 500 microns. Removing every trace of moisture is vital; if moisture remains in the system, it can mix with the refrigerant oil to form destructive acids that will eat away at your compressor from the inside out.
After the vacuum hold test passes, we release the fresh refrigerant charge and turn the system on. We let the system run for 15 to 20 minutes to stabilize before taking precise commissioning measurements.
To help you understand what our technicians are verifying during this phase, here is a breakdown of the target ranges we look for:
| Measurement Type | What It Measures | Ideal Target Range | Why It Matters |
|---|---|---|---|
| Temperature Split (Delta T) | The temperature difference between the return air and the supply air. | 15°F to 20°F | Confirms the system is cooling the air effectively. |
| Subcooling | The cooling of liquid refrigerant below its condensing temperature (for TXV systems). | 8°F to 12°F | Ensures the liquid line is completely full of liquid refrigerant, not gas. |
| Superheat | The heating of refrigerant vapor above its boiling point (for fixed-orifice systems). | 10°F to 15°F | Prevents liquid refrigerant from flooding back and damaging the compressor. |
| Static Pressure | The amount of resistance the blower motor encounters when pushing air through the ducts. | 0.50" WC or less | Prevents premature blower motor failure and ensures balanced airflow. |
By taking the time to measure and record these numbers, we guarantee your system is running at its absolute peak performance. To learn more about why these technical steps are so vital to your home's long-term comfort, take a look at our detailed article on Why Professional Home AC Installation Is Crucial.
Managing Disruptions: Noise, Dust, and Cooling Downtime
We like to keep things honest: replacing an air conditioner is a major home improvement project, and it does come with a few temporary disruptions. Knowing what to expect during your installation day helps you plan ahead and keep your household running smoothly.
Here is a quick list of the common disruptions you should prepare for:
- Temporary loss of cooling: Because your system must be shut down during the swap, your home will be without air conditioning for about 4 to 6 hours. On a hot summer day, your indoor temperature will rise. We recommend closing all blinds, curtains, and windows early in the morning to trap the cool air inside, and utilizing ceiling or floor fans to keep air moving.
- A bit of noise: You will hear some drilling, metal clanking, and hammering as we disconnect the old unit and secure the new indoor coil. You will also hear a steady, low-frequency buzzing sound when our vacuum pump is running. It is not deafening, but it can be distracting if you are trying to make a work call from home.
- Foot traffic and dust: Our technicians will be walking back and forth between your utility area and their service trucks. While we always wear protective shoe covers and lay down drop cloths to protect your floors, a small amount of airborne dust is normal when we cut into ductwork.
- Minor electrical interruptions: We will need to briefly turn off the breaker dedicated to your HVAC system. This will not cut power to your entire home, but the immediate area around your furnace and thermostat will be temporarily without power.
While these minor inconveniences might seem annoying in the moment, they are well worth the reward. Upgrading your outdated, struggling equipment is the single best way to lower your utility bills and banish humid, stuffy air for good. If you are curious about the long-term rewards of this project, check out our guide on How AC Replacement Can Improve Home Comfort.
Post-Installation Walkthrough, Warranties, and Maintenance
When the physical installation is complete, our team's job is still not quite finished. We believe a truly professional installation wraps up with an educational walkthrough that leaves you feeling confident and in total control of your new comfort system.
To understand why this final phase is just as important as the installation itself, you can read about the Top Benefits of Professional AC Installation. When the work is done, we will present you with a complete packet of essential documents.
Make sure you receive and save the following:
- Manufacturer's Equipment Guide: The official manual detailing your specific system model, serial numbers, and operating instructions.
- Warranty Registration Confirmation: Most manufacturers offer a 5-year base warranty that automatically extends to a 10-year warranty if registered within 60 to 90 days of installation. We help ensure this registration is completed so you do not lose out on years of coverage.
- The Signed Mechanical Permit: In many local Wisconsin jurisdictions, a permit and subsequent city inspection are required to verify code compliance.
- Maintenance Plan Agreement: Documentation of your ongoing service plan to keep your system clean, efficient, and compliant with warranty terms.
What to Expect During AC Replacement Walkthroughs
During the final walkthrough, our lead technician will guide you through the operation of your new system. We will show you how to program your new thermostat, explain how to connect it to your home Wi-Fi network, and demonstrate how to use any smartphone apps associated with it.
We will also locate your indoor system cabinet to show you exactly where your air filter goes, how to slide the old one out, and how to insert the new one. We will explain how often to swap it out (typically every 1 to 3 months) to maintain proper airflow. Finally, we will point out your emergency electrical shut-off switches and show you how to spot a clogged condensate drain line before it causes water damage to your home.
Red Flags to Watch For After What to Expect During AC Replacement
While we take pride in our meticulous, high-quality work, we know that not every contractor in the industry holds themselves to the same standard. If you ever have work done by another company, you should keep a watchful eye out for these common installation red flags:
- The "Four-Hour Special": A complete, high-quality AC replacement simply cannot be done correctly in under four hours. If a crew is in and out of your home in a flash, they likely skipped the pressure testing, vacuum hold, and proper commissioning.
- Reused copper line sets: If an installer tries to connect your brand-new R-410A system to old, dirty copper lines from your old R-22 system, they are setting your new compressor up for early failure.
- No vacuum pump in sight: If you do not hear the steady hum of a vacuum pump running for at least 30 to 45 minutes, the installer did not remove moisture and air from the lines. This will void your warranty and ruin your system.
- Weak or noisy airflow: If your new system is incredibly loud when it kicks on, or if certain rooms are barely getting any cool air, the system was likely sized incorrectly or your ductwork was not evaluated for compatibility.
Frequently Asked Questions About AC Replacement
How long does a typical AC replacement take?
For most standard residential homes, a straightforward air conditioner swap takes between 4 and 8 hours. If you are also having your furnace replaced at the same time, or if your home requires minor ductwork repairs, the job will typically take a full day (8 to 10 hours). If you live in Waukesha and need a reliable, timely team to handle your project, you can learn more about our local services on our AC Replacement Waukesha WI page.
Will I be completely without cooling during the installation?
Yes, you will experience some cooling downtime. Because we have to completely remove your old indoor coil and outdoor condenser before we can hook up the new ones, your air conditioning will be offline for about 4 to 6 hours. We highly recommend scheduling your installation during the cooler morning hours, keeping your curtains drawn, and running ceiling fans to stay comfortable. If you are located in Brookfield and want to plan your upcoming installation day, visit our dedicated AC Replacement Brookfield WI page for helpful local tips.
Should I replace my furnace at the same time as my AC?
If your furnace is also over 12 to 15 years old, replacing both units at the same time is highly recommended. Because the indoor AC evaporator coil sits directly on top of your furnace, installing them together saves significantly on labor and ensures both systems are perfectly matched for maximum energy efficiency. To help you decide if a complete system overhaul is right for your home, read our guide on When to Consider a Full AC System Upgrade.
Conclusion
Replacing your air conditioner is a significant investment in your home’s comfort, efficiency, and indoor air quality. By knowing what to expect on installation day, you can prepare your home, minimize disruptions, and look forward to years of reliable, whisper-quiet cooling.
At On Time Heating & Cooling, we serve homeowners throughout Southeast Wisconsin, including Menomonee Falls, Waukesha, Brookfield, Sussex, Delafield, Pewaukee, New Berlin, Mukwonago, Lannon, and Oconomowoc. We pride ourselves on our absolute punctuality, blending old-school customer service with modern technical practices to ensure your installation is done right the first time.
Ready to upgrade your home's comfort? Contact us today to schedule your professional site assessment, or explore our full range of services on our On Time Heating & Cooling Services page.
Related Articles
 Installation
The Ultimate Guide to How Proper AC Installation Affects Long-Term Performance
Discover how proper AC installation affects long term performance with expert setup that boosts efficiency, comfort, and system lifespan for Southeast Wisconsin homeowners.
Read Article Installation
5 Expert Tips for Choosing the Best HVAC System for Your Wisconsin Home
Discover the best hvac setup for southeastern wisconsin weather: 5 expert tips on high-efficiency systems, dual-fuel hybrids & more for Zone 6A homes.
Read Article Installation
Everything to Know About Pewaukee Home Heat Pump Setup
Discover home heat pump installation in Pewaukee, WI: efficiency, cold-climate tech, incentives & pro setup for year-round comfort.
Read ArticleNeed HVAC help?
Whether you need a repair, maintenance, or a new installation, our expert team is here to help.